Links to Creative Critical Review:
Monday, March 24, 2025
Sunday, March 23, 2025
Final Reflection
Now that I have complete all the steps for my portfolio project, it is time to reflect on everything that I have done throughout the process. Firstly, the research stage. The research process is the step that I usually skipped in projects throughout my school years, but this project has taught me just how helpful it can be when trying to create something. Next, the planning process. The planning process greatly helped me organize my thoughts and plan out how much time I would need for each step of the project. At first I thought I wouldn't like the production part of the project as I would have to deal with many issues like lighting, prop design, costuming, and camera angling/stabilization. Instead, once I pushed through all the issues that arose, I actually enjoyed the production processes quite a bit. And finally, the post-production, I expected this step to give me much more headache than I had actually experienced. In reality, I felt as though this step was the easiest and least time consuming part of the project. Overall, I really enjoyed the project and believe that it helped me grow and will continue to help me with future projects throughout my life.
Thursday, March 20, 2025
CCR Post-Production
I have completed the final part of my portfolio project, the CCR. My PC, not being high quality, did not have enough power to run Adobe Premier Pro. For this reason, I decided to start editing my CCR on my smartphone using the CapCut application. It was then when my father's computer was made available to me. But because I already started using the CapCut app on my phone, I decided to continue using it on my father's computer using the PC version instead of transferring it to Adobe Premier Pro.
Tuesday, March 18, 2025
CCR Production
Now that the film opening is completed, it is time to reflect in my creative critical reflection (CCR). In this CCR I will analyze the processes and messages within my project. In total there are 4 questions in the CCR that I must answer. I created 2 videos each answering 2 of the questions. The 2 videos I created were of 2 different forms. I answered the first 2 question together in the form of a street interview and the last 2 in the form of a podcast.
CCR Questions:
1. How does your product use or challenge conventions and how does it represent social groups or issues?
2. How does your product engage with audiences and how would it be distributed as a real media text?
3. How did your production skills develop throughout this project?
4. How did you integrate technologies – software, hardware and online – in this project?
Monday, March 17, 2025
Film Opening Post-Production
After a day and a half of filming, we finally collected all the needed footage. Although there were many bad takes because of lighting issues, forgetting lines, or interruptions, I feel that the final takes we used turned out well. After collecting all the footage, the last step to produce the final film opening is to edit the footage in post-production. I had originally planned to use Adobe Premier Pro to edit my film opening because I know that it is a great program with many features and it is provided by my school. But, the computer that I have access to at home didn't have enough space to download the program. It was an easy fix to free up some space for it though. Unfortunately, another problem with the program occurred, the computer that I have at home does not have the power to run Premier Pro. For this reason, I resorted to using my phone and cap cut to edit my film.


The editing went over pretty well and the hardest part of the post-production process was finding the audio clips that we needed from the audio databases. Thankfully, I had me and my partner searching for the audio at the same time so we could cover more audio samples until we found the ones we thought would work in the the context of the visual components.
Saturday, March 15, 2025
CCR Q#3 and Q#4 Research
The third question of the CCR is "How did your production skills develop throughout this project?"
The way that this project developed my skills is through experience. It taught me that I should always have many backup plans for each step of any project, as it seemed like anything that could've went wrong, did go wrong. Although everything not working was extremely inconvenient, it furthered my problem solving skills greatly. It also helped me develop my artistic skills while creating the monster out of clay. It also improved my production skills with lighting and camera angles.
Friday, March 14, 2025
CCR Q#1 and Q#2 Research
The first question of the CCR is "How does your product use or challenge conventions and how does it represent social groups or issues?"
The main convention that our product challenges is showing the monster attacking people in the opening of the film to hook the audience. Our film only implies the violence using audio and visual techniques.
The main social issue that is represented in our film opening is how the government remains mostly unchecked by the population and they are able to do. This can sometimes lead to disasters as seen in our film opening
Another social issue is represented in the film opening is how human beings as a race believes that they are above nature and have absolute control over it. This is not true and often leads to problems, as seen in the opening.
Thursday, March 13, 2025
Finally Producing
Although the tank and the monster created a huge problem and headache for me, we acquired completed all the props we needed and have stared the filming process.

.png)
.png)
.png)

.png)
.png)
.png)
Unfortunately, by the time we finished all the props, it was around 8:30 PM and my partner had to leave at 8:45 PM. My partner also said that he is unable to meet up again to finish the filming. Because of this we filmed the scenes that he is seen in first and are going to change the way the opening is shot a little so that he is not in any others.
These are the best takes of our unedited footage we filmed so far
We had a tough time trying to get the lighting right as it needed to seem like a dark room but still have enough light to see that there was people there. We tried turning on and off different combinations of lights across the house seeing how much light each of them produced for the camera to see. Eventually we turned off all the lights in the house and used a flashlight on low brightness aimed at the white ceiling, producing the perfect amount of light we were looking for. We also adjusted the exposure of the camera to make it darker than it would've been.
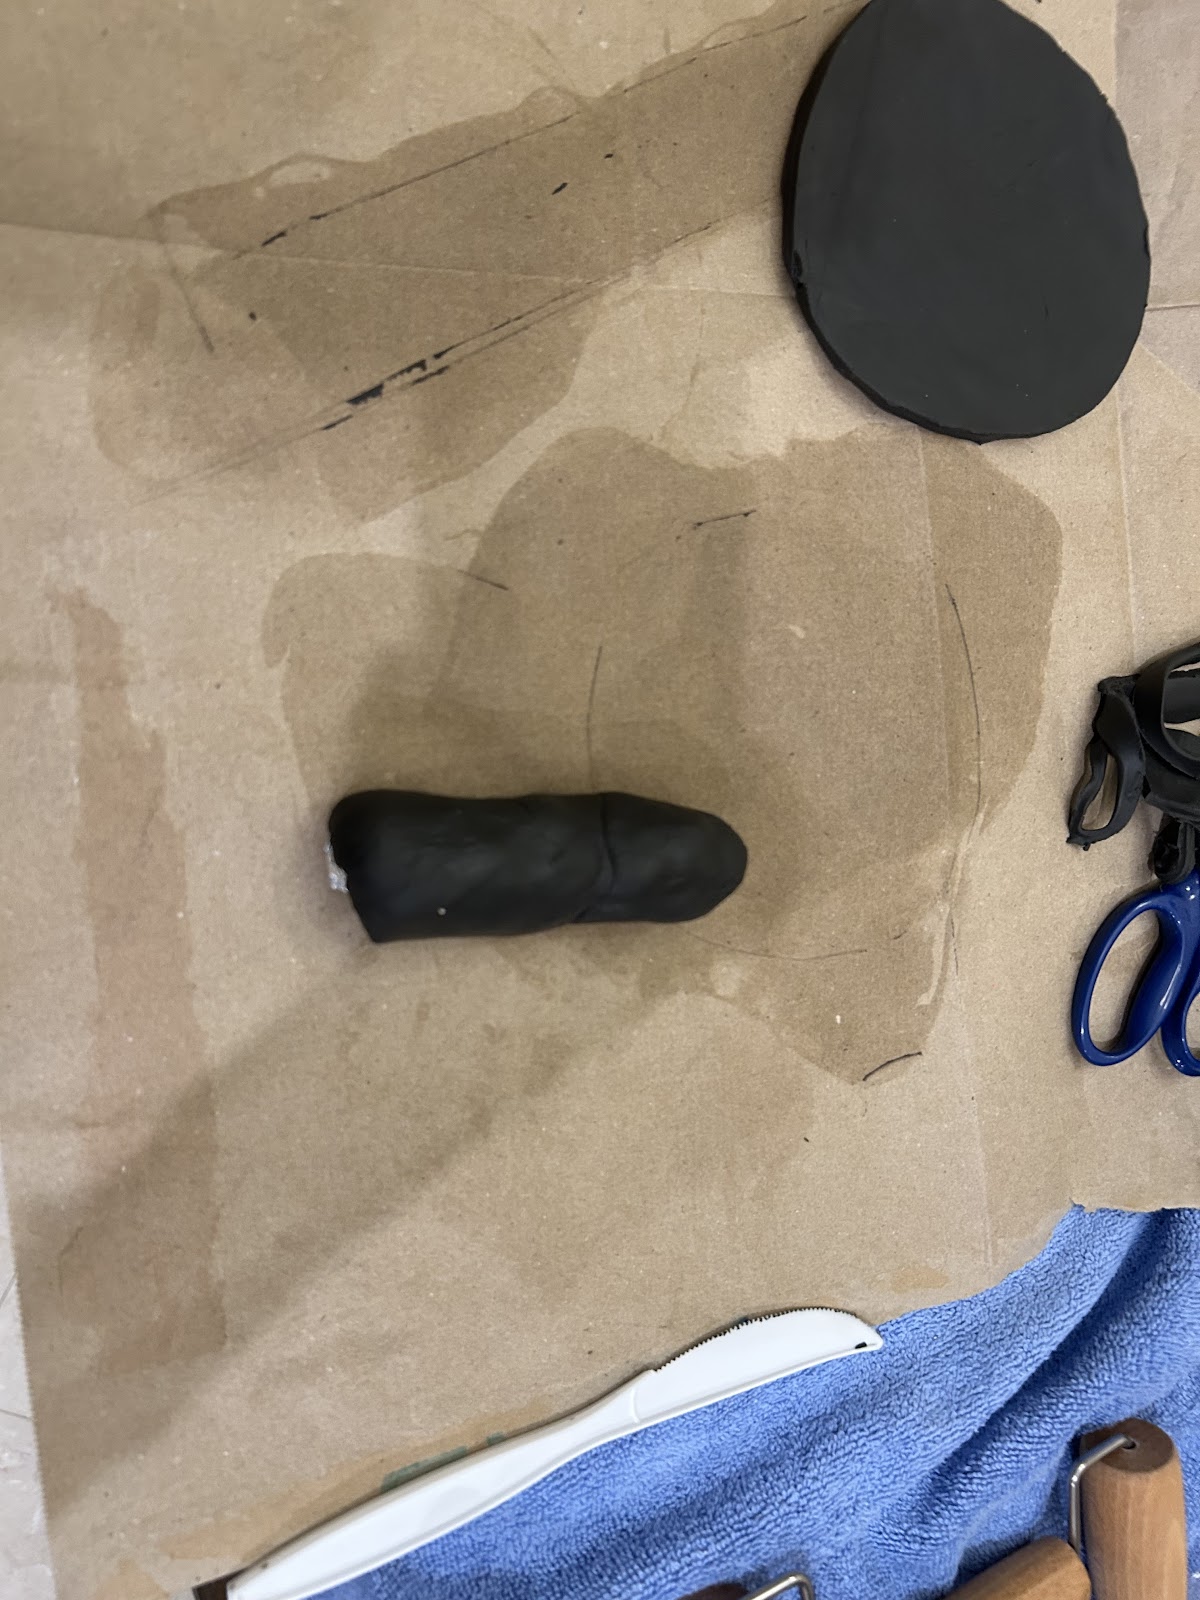
Wednesday, March 12, 2025
Issues
We had some trouble with the monster... it broke. The tail of the stage 4 monster broke off after the baking and clear coating processes. Unfortunately, the clay was completely hardened at this point and couldn't just be reattached.


Solution #1 (fail): My first solution was to use craft glue... it was not a good idea. The glue I used was supposed to set in 1 to 2 HOURS. So we bailed on that idea but it left a residue on the clay.
Solution #2 (fail): My second solution was to use hot glue to try to stick it back on. Unfortunately, I found out that hot glue doesn't not stick to dry clay at all, it could've been because of the residue left by the craft glue. It held for as long as the hot glue was still liquid. Once it dried, the tail fell right back off with a soft thud.
Solution #3 (fail): My next idea was to use more clay as an adhesive. The clay was nowhere near strong enough to hold the tail on by itself. I then tried to use a blow drier to harden the clay buy found out that the hair drier doesn't get anywhere near the temperature the clay needed to harden.

Solution #4 (Success??): My final idea was to use clear tape and put more clay over it to try to hide it. So far it has held and i have sprayed another coat of the clear coat. At this point is being held together by my hopes and dreams.

Tuesday, March 11, 2025
Group Meeting
Today I participated in a group meeting with people producing other projects. In this group meeting there where 5 people including me. In the group there was Leela Mohan (Pearly Whites), Fabiana - (Interloo), Clemence Frey - (Turbulence), Becherucci - (Air Ball), and me - (Titan).

During the meeting we discussed what are projects were about (the name, the genre, and the general storyline), how far along we were in our projects, and any problems we were having. The problem that I mentioned having was that the monster being made out of clay took away from the monster feel. The proposed solution was to add more detail such as, adding the bone structures to the monster to make it feel more lifelike. Unfortunately, my partner and I are not skilled enough with clay sculpting to pull off such a feat. We then discussed the problem even more and decided that the clear coat idea was the best one because it would take the clay look away while still being relatively easy to pull off. Thankfully, we didn't have many other problems that needed to be solved. Overall, this meeting was productive in getting feedback on how to fix the clay problem.
Saturday, March 8, 2025
Change in Plot/Script
Unfortunately, I was unable to obtain the military general's military fatigue outfit for the General Adil character. After trying to find various solutions, I finally realized that he was not a necessary character for the opening of the film. With this realization, I consulted with my partner and we agreed that we can get rid of the character all together and just adjust the script accordingly. We also had to change the script because after review we realized that we were way to ambitious and creative. We aren't able to pull of most of the things in the original script.
Thursday, March 6, 2025
Constumes
For the costumes, we need two white laboratory coats and one military general's military fatigue. In a previous post I mentioned that my mom was able to sew a the fabric from a few pillow sheets into two lab coats. Unfortunately, the stitches didn't hold up and started falling apart as I was trying them on. So that was bust. For the military general's military fatigue, the most I found on amazon or other costume shores were around $30, way above my budget. I also couldn't find any of the needed costumes at any thrift stores around me. Thankfully, one of my uncles is a retired doctor and had two white lab coats that he said I could borrow. So we got the coats now, but they have stitched in logos that he wants us to cover up. So we plan on using name pins to cover it.

For the military fatigue, I will keep looking at thrift stores to see if I can find one and ask around to see if anybody has one I could borrow.
Tuesday, March 4, 2025
Monster models
It's time to think of the main attraction to the film, the monster. First, I drew out the general plan for the monster in the tank that I made in the my previous blog post. Then, I made initial models for what the monster will look like. I will finalize what the monster will look like once we determine what the final tank is.

Stage 1:
Monster is still just a liquid in the bottom of the tank. This is before any tests are run on it and is completely docile.

Stage 2:
The pool of liquid sprouts upwards but no features are created yet. The monster still remains completely docile.
Stage 3:
The monsters sprout grows in size and sprouts small stubby arms. No head or any other features are made out. The monster continues to remain docile.

Stage 4:
The monster grows again with the arms getting longer. The monsters head starts to gain shape as the monsters begins to move its arms. The monster shows small signs of aggression at this point.

Stage 5:
The monster is grown once again and the head is complete. The arms and legs gain an eerily long length and the monster is extremely aggressive.

I know the monster doesn't look the best right now and looks just like clay. But once we finalize the rest of the props, I will add more detail. We will also spray the monster with a clear coat of paint to make it shiny, hopefully removing that clay look.
Monday, March 3, 2025
Double-Walled Tank
After mentioning it many times in my previous blog postings, I have finally made the double-walled tank, although a little differently than originally planned. With the first try being a bust and me not have the funds to buy more plastic sheets for more attempts, I had to find objects or materials lying around the house that I could use as substitutions. I looked for a while until I went into the storage closest in the attic. Inside, I found a old vase that had originally been holding a bouquet of tulips two valentines ago and a small clear plastic trash can.

The two objects will serve as substitutes for the two walls. The trash can being bigger with an 8.5 inch diameter, will act as the outer wall with the 6 inch diameter flower vase as the inner wall. The two fit nicely together with about a 1.25 inch space in between the two. Because the inner flower vase displaces water it acted as a boat and wouldn't stay at the bottom of the trash can. It was displacing so much water that I struggled for a while trying to put things inside heavy enough to way it down. I then tried another method of gluing the two together. For the adhesive, I used hot glue because it isn't water soluble. Unfortunately, the glue doesn't stick well to the glass and would separate once water was added. We are going to try to use another adhesive to see if it works better, and if not, we might have to modify the idea. The modified idea is to use dry ice and colored lights to add a cool looking effect inside the tank. This is also cost effective since dry ice is sold for about $1.62/lb. around me and I would only need a pound for this project.

Subscribe to:
Comments (Atom)
Links to Final Film Opening And CCR's
Links to final complete Film Opening: Links to Creative Critical Review:

-
Links to final complete Film Opening: Links to Creative Critical Review:
-
 The next step in the production process of the film's opening is choosing a genre. This is a very important decision as the genre ch...
 -
 It's finally here!! Starting with this one, my blogs from now on will be about the portfolio project, the most important project o...
